Once a node has been made available it needs to be placed into a flow, configured and connected with other nodes to form a routing flow. Depending on the node type there may be parameters that need to be configured to define how the service should behave. The parameters will provide the data required for the node to complete its function or return information to be used elsewhere in the flow.
Some parameters apply to an entire node whereas other parameters apply to a branch within the node. Some nodes and branches do not need to be configured at all.
Configuring Nodes #
Most flows will contain multiple nodes which need to be configured and connected together using paths in order to define a routing flow. A path is created by connecting each node’s branch to other nodes. A path always starts from a branch and connects to the next node’s name.
 1. Navigate to the relevant routing flow and click the Flow editor icon


- Navigate to the relevant routing flow and click the Flow editor icon
- Add the required nodes from the node library
- Drag the nodes into the workspace area
- Use the branches to connect the nodes
- To configure the parameters for a node:
- Click the node name in the routing flow
- Configure the parameters as required
- To configure the parameters for a branch:
- Click the branch name in the node in the routing flow
- Configure the parameters as required
- Configure all the nodes and branches in your routing flow
- Note: When there are no further actions to take after exiting a particular node, connect the branch to a node that marks the end of a routing flow, such as an End Call node.
- Click Validate and Publish
- Review the Validation result and click OK
- The flow will be published ready to be assigned to a service
| Note: Nodes that are placed in a routing flow but are not fully configured display a ! icon next to the appropriate node name or branch name. This enables you to easily identify nodes for which parameters must be entered or branches must be configured to complete the routing flow. |
Adding optional branches #
Most nodes have at least one mandatory branch. Optional branches can be added to some decision-making nodes to provide more options to customers. Unlike mandatory branches, optional branches can be added and deleted as required.
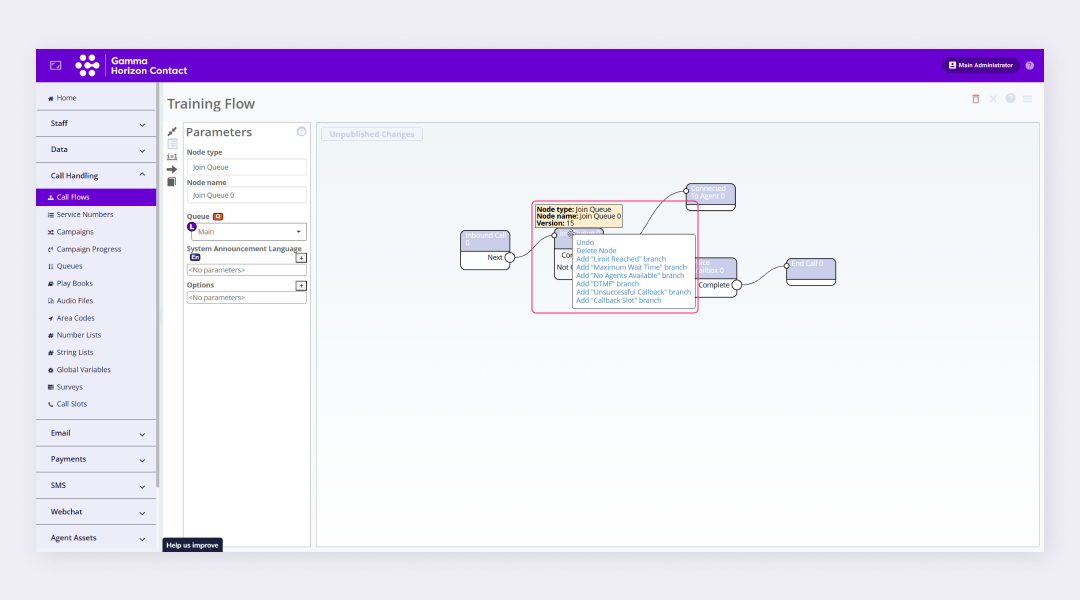
- In the flow editor select the node you want to add an optional branch to
- Right-click on the node name
- Select the relevant branch to add
- Configure the parameters for the branch
- To edit a branch name simply enter a new name in the Branch Name field
- Continue configuring the flow as required
If you add a branch that you did not mean to add, remove it by right-clicking on the branch and selecting Delete Branch.
| Note: Renaming a branch does not in any way affect how the branch functions—it is purely for your information. |