As the holiday season approaches you may need to amend your call flows to include specific days when a business is closed.
Our call flow should operate like this –

This is achieved via three sections – Holiday Lists, Time Ranges and Call Flows.
If you are unfamiliar with those sections further information can be found on the following pages –
Step 1 – Holiday List
First we need to create a holiday list. This is done in the Holiday List section, under the Staff heading on the left.
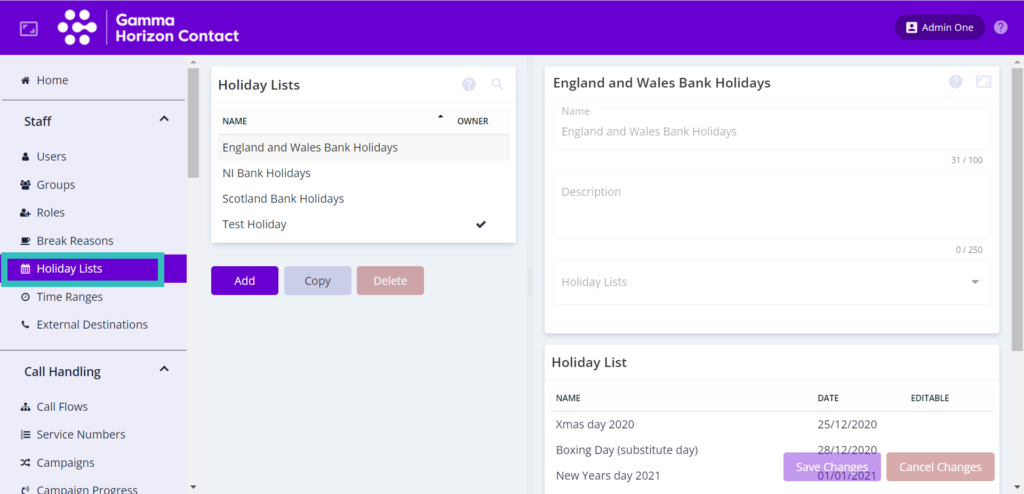
On this page you will see any holiday lists already created, including the default England/Wales Bank Holidays, Northern Ireland Holidays and Scotland Bank Holidays. If these have the appropriate days included then you can use them without modification.
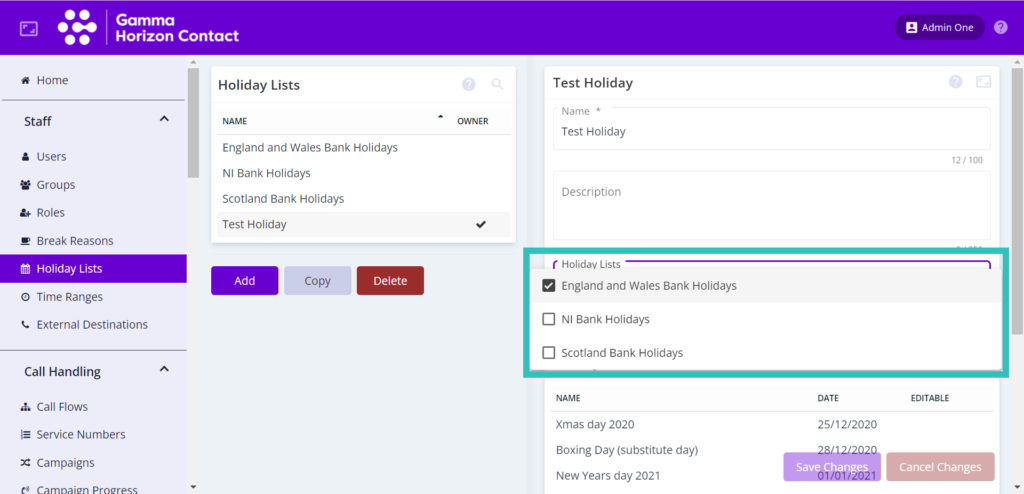
If you wish to add or remove any dates, click ‘Add’ to make a new holiday list. Give this list a name and description and add any of the default holiday lists (for example, England and Wales Bank Holidays) as a starting point if applicable.
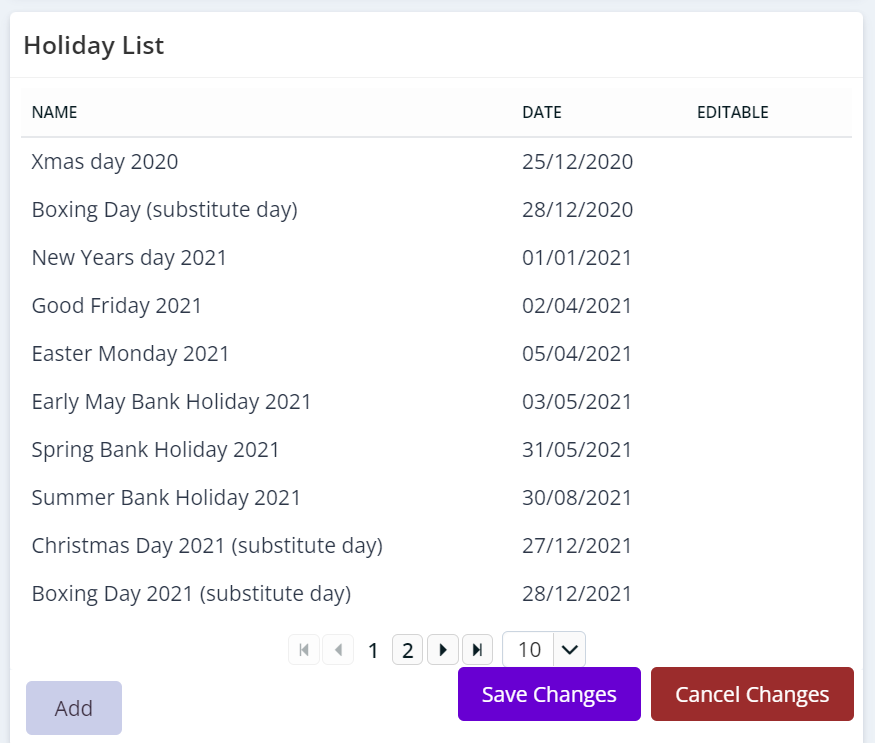
You can then add any specific dates as required using the Add button and then save your new holiday list with the Save Changes button.
Step 2 – Time Ranges
Now that we have created an appropriate holiday list, we can use this to control a time range. You may have already created a time range to control your call flow but we will create a new one just for the holiday dates.
First go to the Time Ranges section found under Staff, then click the Add button to create a new time range.

Name the time range and give it a description then ensure that the ‘Use holiday lists in time range configuration’ option is selected. Then choose the holiday list that you created or amended in the Step 1.
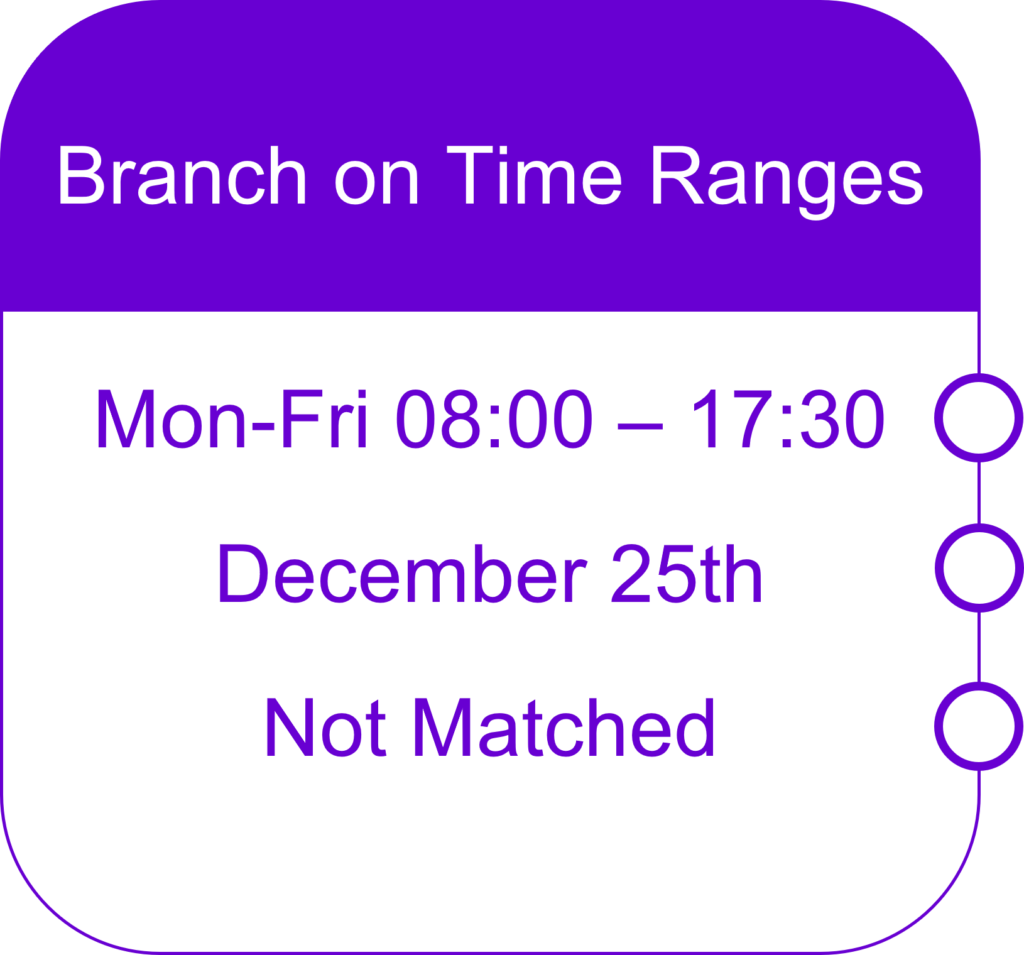
You will want to ensure the following time range rule is defined –
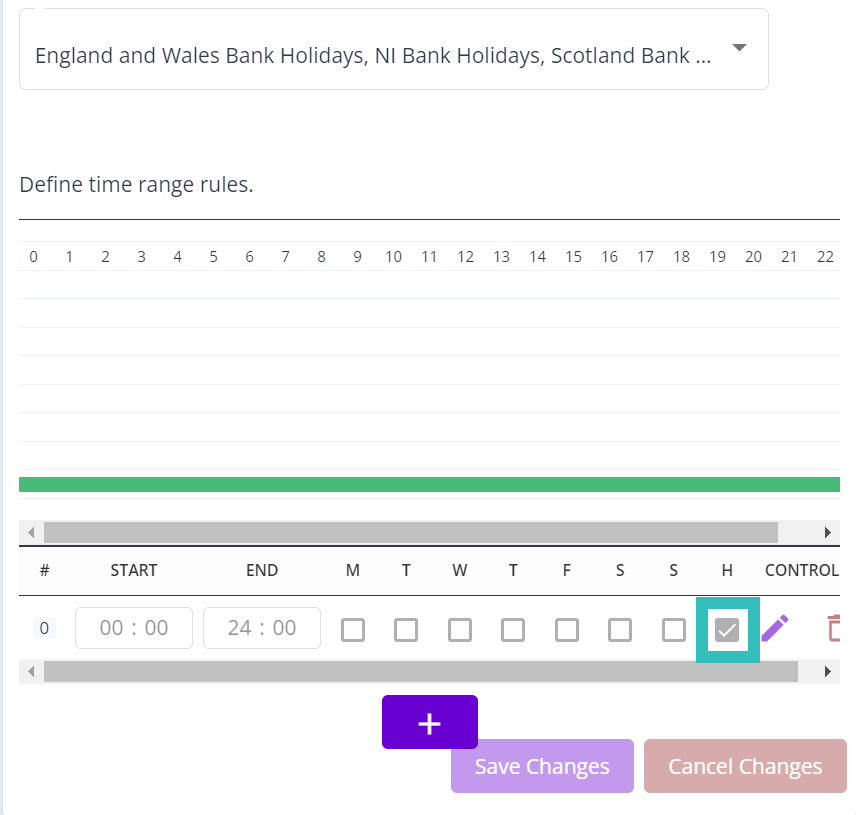
Add a rule by clicking the + button and then make sure the start time and end time is configured to cover the entire 24 hour period and that the H option is ticked. This time range will now use the holiday list we made earlier and, if a date matches a holiday, have it apply for the entire day. Please note that the H option is used in addition to any other days of the week selected here.
Step 3 – Call Flows
The final step is to amend our call flow/s to include this new time range and route our customers depending on whether the business is open or closed.
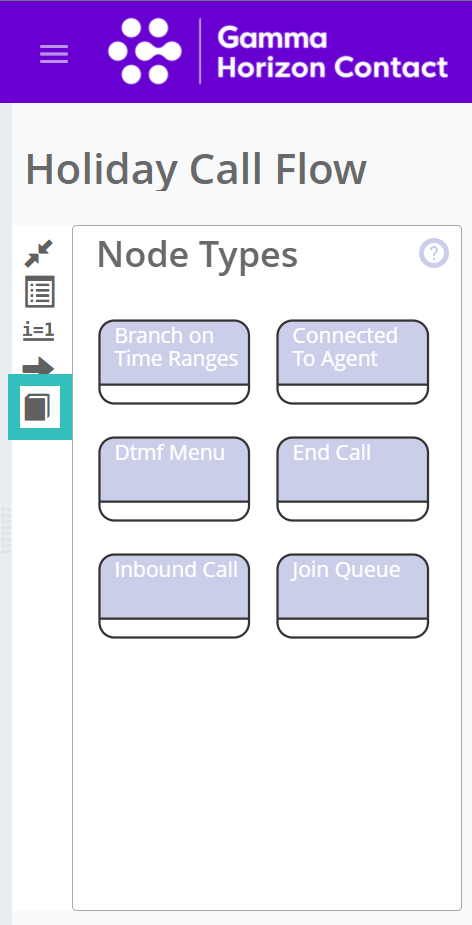
Go to the Call Flows section under Call Handling.
Choose the call flow you wish to amend.
You may already be using a Branch on Time Ranges node to control when the business is open or closed during the regular working week. If not, use the Node Type Library button on the left to add a Branch on Time Ranges node to your call flow. You can learn more about the Branch on Time Ranges node here.
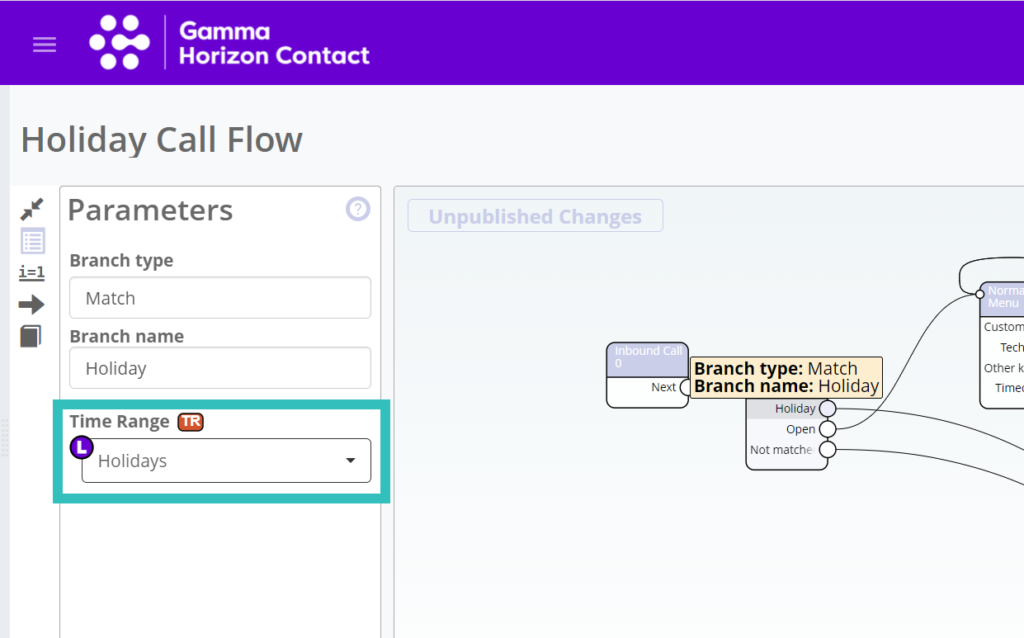
You will want to add at least two Match branches if you are setting up the Branch on Time Ranges node for the first time. Rename the top Match branch to Holiday and the second to Open.
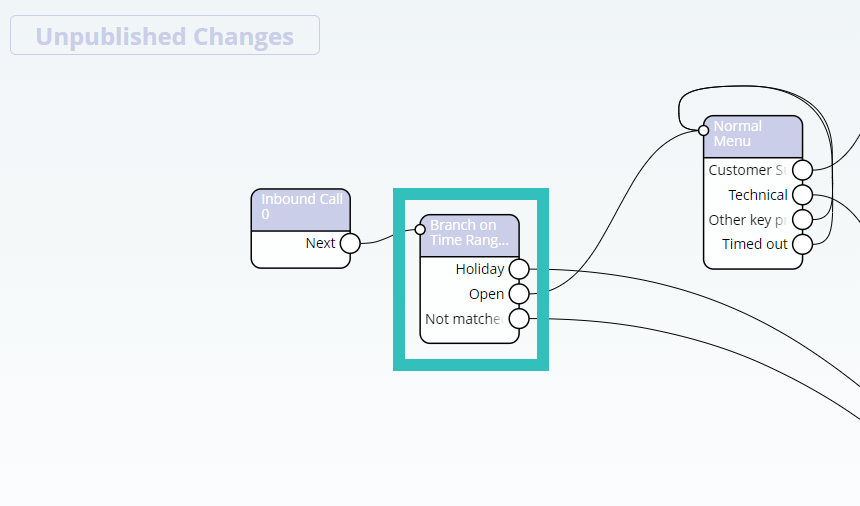
It is important to put the holiday branch first as Contact works through the Branch on Time Ranges node from top to bottom.
With the above example, December 25th may land on a weekday and so between business hours, Contact will send the call through the regular flow as it matches the time range inside that branch.

In this example, it does not matter what day of the week December 25th happens to be as on that date the call will be sent through the specific branch, to the a holiday announcement, voicemail etc. On any other date the calls will flow as expected.
Please note –
If you are already using a Branch on Time Ranges node in your Call Flow, you may want to add an additional Branch on Time Ranges node rather than edit your existing one.
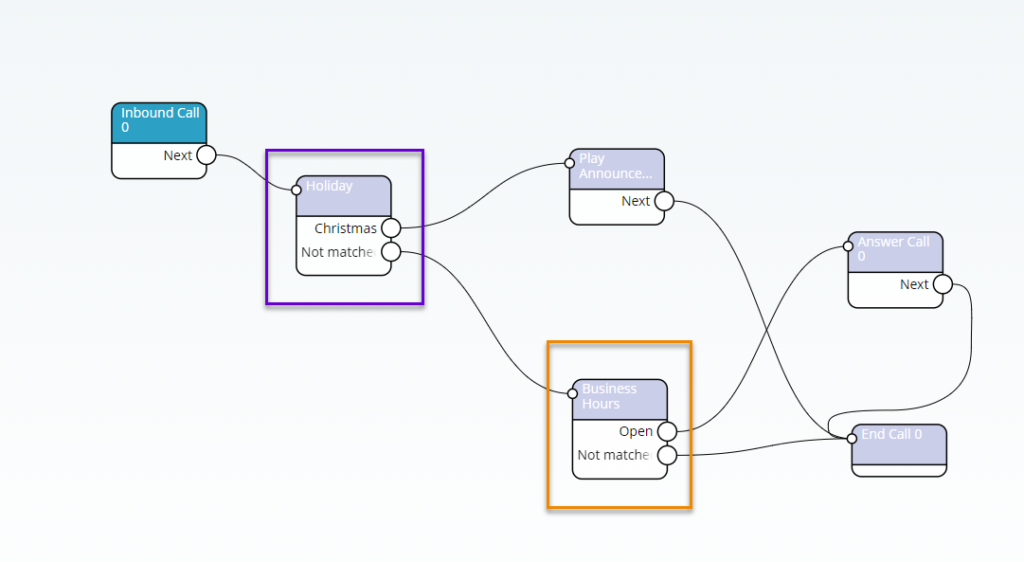
You are free to connect those branches as needed, for example you could connect the Holiday branch to a Play Announcement node to advise callers of the holiday opening hours, then to a Voice Mailbox node or perhaps an Route to External Number node for offsite support.
Once you have connected the Branch on Time Ranges node as required, click on the Holiday branch inside of that node to view the parameters. From there make sure to select the time range that you created earlier.
Contact will now route callers through your call flow as appropriate.
Continue to Step 12 – Validate and publish the completed call flow