Contact Microsoft Dynamics Integration
Introduction
This document will walk you through the step-by-step process to set up the Microsoft Dynamics integration.
Gamma Portal
Please ensure that you have purchased the required CRM bolt on via the Gamma portal for the users who require this. You will also need to ensure that you have all the relevant Contact licences.
Step 1- Contact Integration
Open the channel integration framework application on MS Dynamics.
- Log in to your Microsoft Office account on the web.
The MS Dynamics app should be displayed:
- Click Dynamics 365.
The Dynamics 365 Home page is displayed:

- Click Channel Integration Framework.

Note: If you have opened one of the other Dynamics 365 apps, you can switch to Channel Integration Framework by opening the Dynamics 365 dropdown menu and then selecting Channel Integration Framework:

Step 2 – Contact Settings
- Navigate to Channel Provider Configuration > Channel Providers.
The Active Channel Providers dialog is displayed:

- Either create a new channel provider or edit the settings for the existing provider as appropriate.
The following shows an example configuration:

The Channel URL is constructed as follows:
- Enter the login page of Contact system.
For Horizon, this would be: https://contact.unlimitedhorizon.co.uk/login
- Then add on: ?msdyn=true&from=
- Then add on the URL of the MS Dynamics app (look at the URL at the top of your page and use the host and company CRM name in the first component of the URL), followed by .dynamics.com
For example, if the URL for your company looks like this:
Then the section of the URL that you need is mycompany.crm11.dynamics.com
So, in this example the completed Channel URL for Horizon would look like:
Step 3 – Configure Contact Communication Channel
- In the top-right corner, click:
 and select Advanced Settings
- Open the dropdown menu for Settings (second menu on the black ribbon) and then select Customisations.
- Select Customise the System.
- Navigate to Entities > Contact > Forms and then select Contact:
- The Contact form is displayed.

- Double click on Business Phone:

- Select the Controls tab, then click Add Control:

- Select Channel Communication Control and click Add.
- Click the radio buttons for:
- Web
- Phone
- Tablet
- then click OK.

- Return to the Contact Form, and then repeat steps 5 to 8 for Mobile Phone.
- Return to the Forms dialog (in step 4), and repeat steps 4 to 8 for every phone field in every form that you might want to use.
Note: If you do not configure a phone field to use the embedded CRM, it will try to dial out directly.
- Click Save.
- Click Publish.
You can now navigate to the CRM Hub in the Dynamics 365 dropdown menu and the app should be available in a panel on the right.
Result
Agents should now see Contact softphone within MS Dynamics.
To use Contact, agents must enter their Contact login details into the softphone.
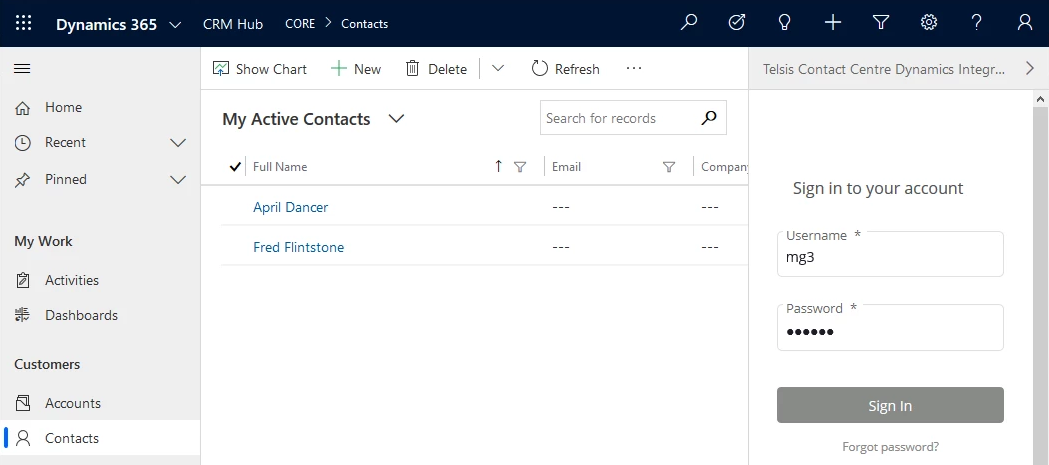
Agents can now answer calls within MS Dynamics.